Jenni Benerofe

Jenni Benerofe AKA The Balaboosta Chef won us over with her fresh and clean recipes, which also happen to be quite delicious. She’s a personal chef if you’re lucky enough to live in the New York area and offers virtual classes for the rest of us! Looking for dinner inspiration? She designed this meal just for us!
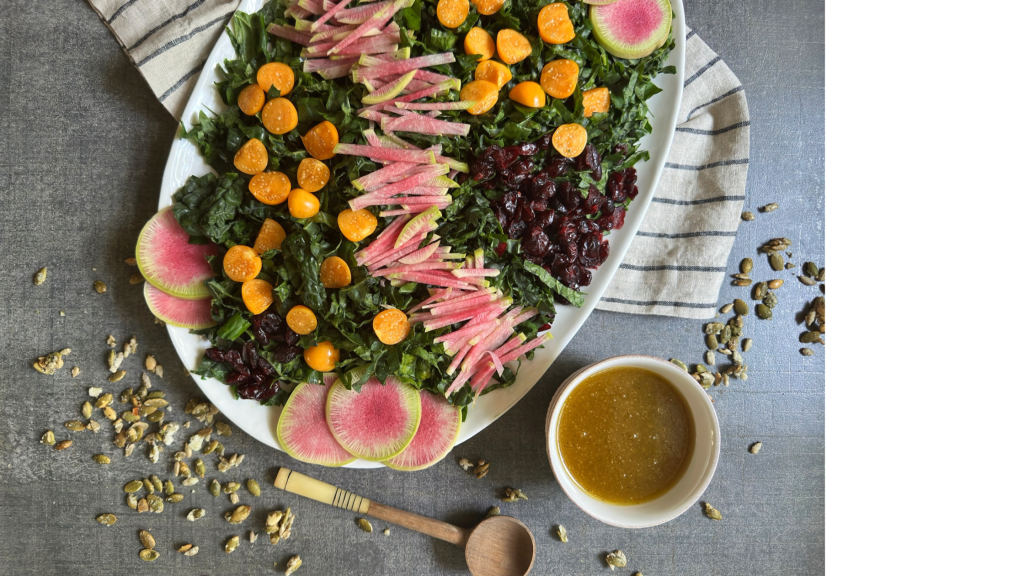
WINTER KALE SALAD WITH MAPLE CIDER VINAIGRETTE
If there’s a kale salad on a restaurant menu, you better believe I’m going to order it. And thanks to the PR firm hired by The American Kale Association, we can ALL eat one nearly every time we dine out. Yes, even vegetables have publicists! Who knew? The best kale salads all have one thing in common: the kale is shredded to oblivion and massaged within an inch of its life. This sweet and salty version is bright and beautiful and makes good use of some lesser-known produce like watermelon radish and gooseberries. Take my advice and double the Candied Pepitas or risk snacking through your entire stash before the salad hits the table!
Equipment
- Hand Mandolin (optional)
- Large bowl
- Mason jar
- Large non-stick sauté pan
Ingredients
Candied Pepitas
- ½ cup raw pepitas (or sub whatever nuts or seeds you have onhand)
- ¼ cup raw sunflower seeds
- 3 tbsp granulated sugar
- A pinch of kosher salt
Dressing
- ¼ cup maple syrup
- 2 tbsp apple cider vinegar
- 2 tsp dijon mustard
- 1 tsp kosher salt
- 1 tsp fresh ground black pepper
- ⅔ cup extra virgin olive oil
Salad
- 1 bunch Lacinato kale (aka Tuscan Kale or Dinosaur Kale) washed
- 1 watermelon radish peeled using a vegetable peeler
- 1 container gooseberries or goldenberries halved (sub grapes if you can’t find)
- ½ cup dried cranberries
Instructions
Candied Pepitas
- Heat a non-stick saute pan to medium heat and add the pepitas, seeds, sugar and kosher salt.
- Stir gently, watching as the sugar begins to melt.
- Continue to cook, lowering the temperature if needed so the seeds don’t burn, until the sugar is fully melted.
- Transfer to a piece of parchment paper or small plate to let cool completely.
- They will be a little soft at first and then become crunchy as they sit. Set aside until ready to use.
Dressing
- Place all ingredients in a large mason jar and shake until fully emulsified. You can also do this in a mini food processor if you want a creamier look to your dressing.
Salad
- Kale stems are too tough and chewy to eat, so you’ll want to remove them before making this salad. The quickest way to do this is to hold the stem firmly in one hand and gather the leaves between the thumb and forefinger of your other hand. Pull the leaves along the stem in one confident motion, applying enough pressure to strip the leaves from both sides. You can also fold the leaves lengthwise over the stem and cut the stems off at the fold if that’s easier. After you’ve de-stemmed, chop the kale into thin, shredded strips.
- Thinly slice the watermelon using a hand mandolin, or manually using a chef’s knife. Cut each slice into thin strips. Watermelon radishes are beautiful, so be sure to save a few round slices to use as a garnish while plating. Next, cut each gooseberry in half.
- Thinly slice the watermelon using a hand mandolin, or manually using a chef’s knife. Cut each slice into thin strips. Watermelon radishes are beautiful, so be sure to save a few round slices to use as a garnish while plating. Next, cut each gooseberry in half.
- To serve, place the shredded kale on a large platter or low bowl and massage gently with your hands. This will soften the leaves and make it less fibrous and tough to eat. Toss with just enough of the dressing to coat. Having extra dressing leftover for the week is a bonus! Arrange the watermelon radish, gooseberries and dried cranberries over the top of the kale. Drizzle a little more dressing over the toppings. Finish with a generous handful or two of candied pepitas.
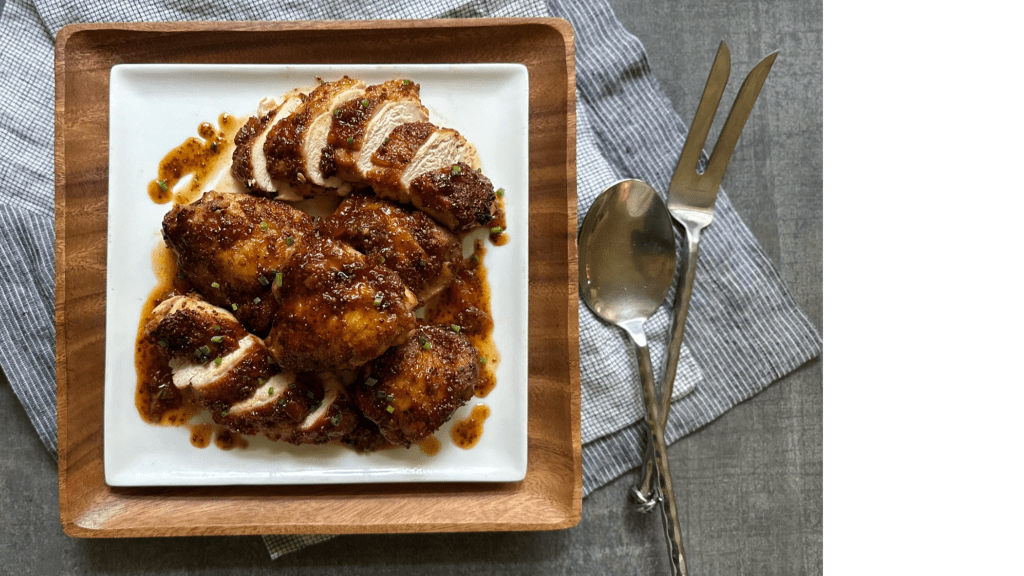
MAPLE APRICOT ROASTED CHICKEN
Food bloggers be like: “Here’s a great recipe that uses all your pantry staples!”…and then they drop an ingredient list bomb featuring pomegranate syrup, chipotle paste & bee pollen. (note to self: buy pomegranate syrup, chipotle paste & bee pollen STAT). This dish is NOT that. A true Pantry Staple Hero, this impressively simple chicken is ready in 25 minutes and promises not to ask for any hard to find ingredients. The sauce thickens into a highly addictive glaze that is sweet, but not cloying…smokey, but not spicy….cute, but hella sassy. That last one is more about me than about the chicken but you get the gist.
Servings: 4 servings
Equipment
- medium bowl
- 10” cast iron pan
Ingredients
Maple Apricot Sauce
- ½ cup apricot preserves
- ⅓ cup Dijon mustard stone ground mustard or a mix of both
- ¼ cup real maple syrup
- 3 cloves garlic finely minced
- 1 tsp Spanish smoked paprika
- ¼ tsp kosher salt
- ¼ tsp freshly ground black pepper
Chicken
- 3 pounds bone-in skin-on chicken thighs if you sub chicken breasts instead keep the skin on but remove the bone and cook 5 minutes longer in the oven)
- 1 tbsp olive oil
- ½ tsp kosher salt
- fresh ground pepper
Garnish
- a few fresh chives minced
Instructions
- Preheat the oven to 400°F. Place the top rack in the upper third of the oven.
Maple Apricot Sauce:
- Mix all ingredients in a bowl and set aside.
Chicken
- Season the skin of the chicken generously with kosher salt and ground pepper. Place a cast iron pan on your stovetop and heat on high. Arrange chicken in the pan skin side down and let sear undisturbed for 5 minutes or until skin is evenly golden browned. Turn off heat and flip the chicken skin side up. Pour the sauce over the top of the chicken and transfer to the preheated oven.
- Roast for 20 minutes or until chicken is cooked through.
- Transfer the chicken to a medium serving platter. Pour the sauce over the chicken and garnish with chives before serving.
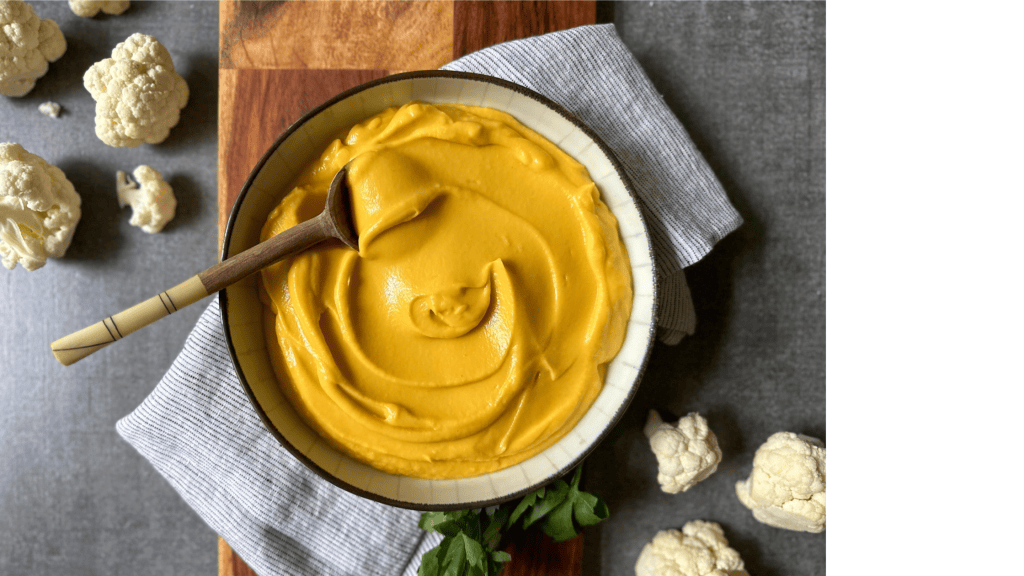

CREAMY CAULIFLOWER & CARROT PUREE
I’m not usually a one-trick pony, but this healthy side dish does seem to appear on nearly every
one of my menus lately. And who can blame me? It’s rich and flavorful, yet also versatile enough to pair
with just about any main course you throw at it. The coconut milk gives it some serious depth of flavor
without the coconut-forward taste all while keeping it dairy free, too. Since we eat with our eyes first,
throwing a carrot or two into the mix lends a beautiful orange hue to the mash, narrowly avoiding a
dreaded Shades of Beige Dinner Plate situation that plagues many cauliflower-centric meals. This mash
keeps beautifully in the fridge for 3 to 4 days so don’t be shy about breaking out the leftovers all week
long!
Servings: 6 servings
Equipment
- Large saucepan with lid
- Food processor or blender
Ingredients
- 2 large cauliflowers cut into small florets
- 2 carrots peeled and cut into thin slices
- 4 whole garlic cloves
- 14 oz can full-fat unsweetened coconut milk
- ½ cup chicken stock or vegetable stock
- 1 ¼ tsp kosher salt
Instructions
- Place all ingredients but the salt into a large saucepan. Cover and cook over medium to medium-low heat to avoid burning until the cauliflower and carrots are soft to the touch. This should take about 20 minutes.
- Transfer to a food processor and puree until smooth. Season with salt, taste, and adjust for seasoning if needed before serving.
Notes
If you halve this recipe, make sure to shake the coconut milk thoroughly to emulsify, or whisk it well
in a bowl before measuring.
in a bowl before measuring.